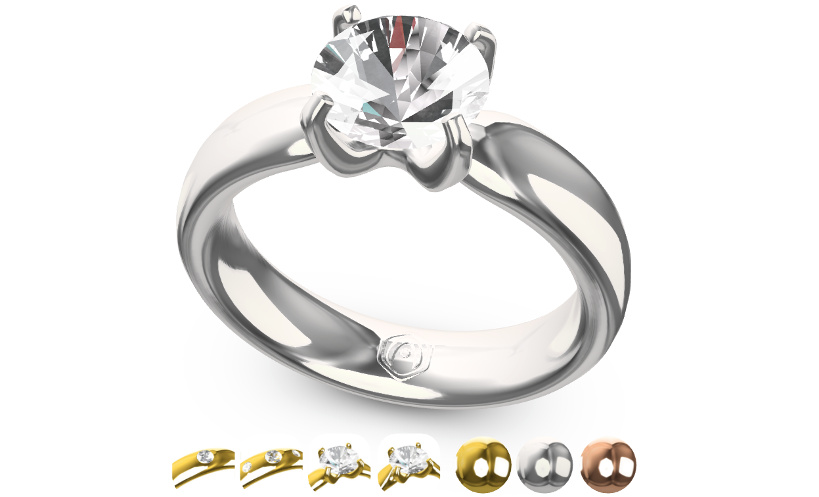
In our previous article Do-it-yourself 3D product configurator, we discussed creating a basic jewelry customizer app using the Verge3D framework combined with Blender, 3ds Max, or Maya modeling suites.
Today we’re going to upgrade this project and make it a more real-life e-commerce application which includes the following must-have features:
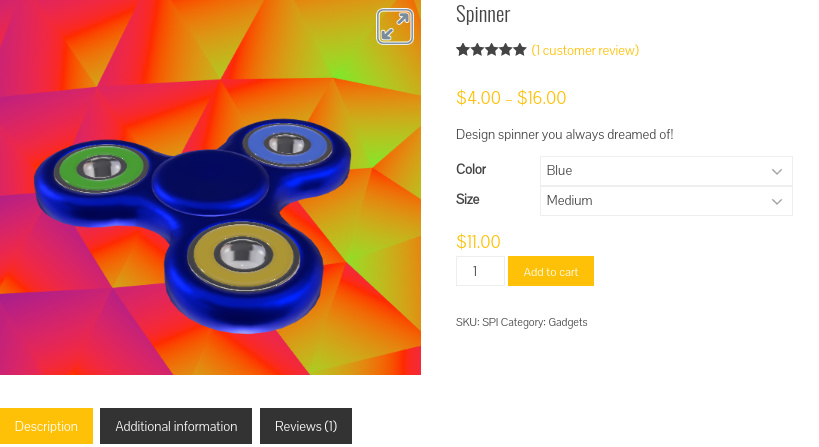
- Calculating the price based on the user’s configuration.
- Submitting orders for further processing by a sales manager.
- Social media buttons.
Eventually, we will have something like this:
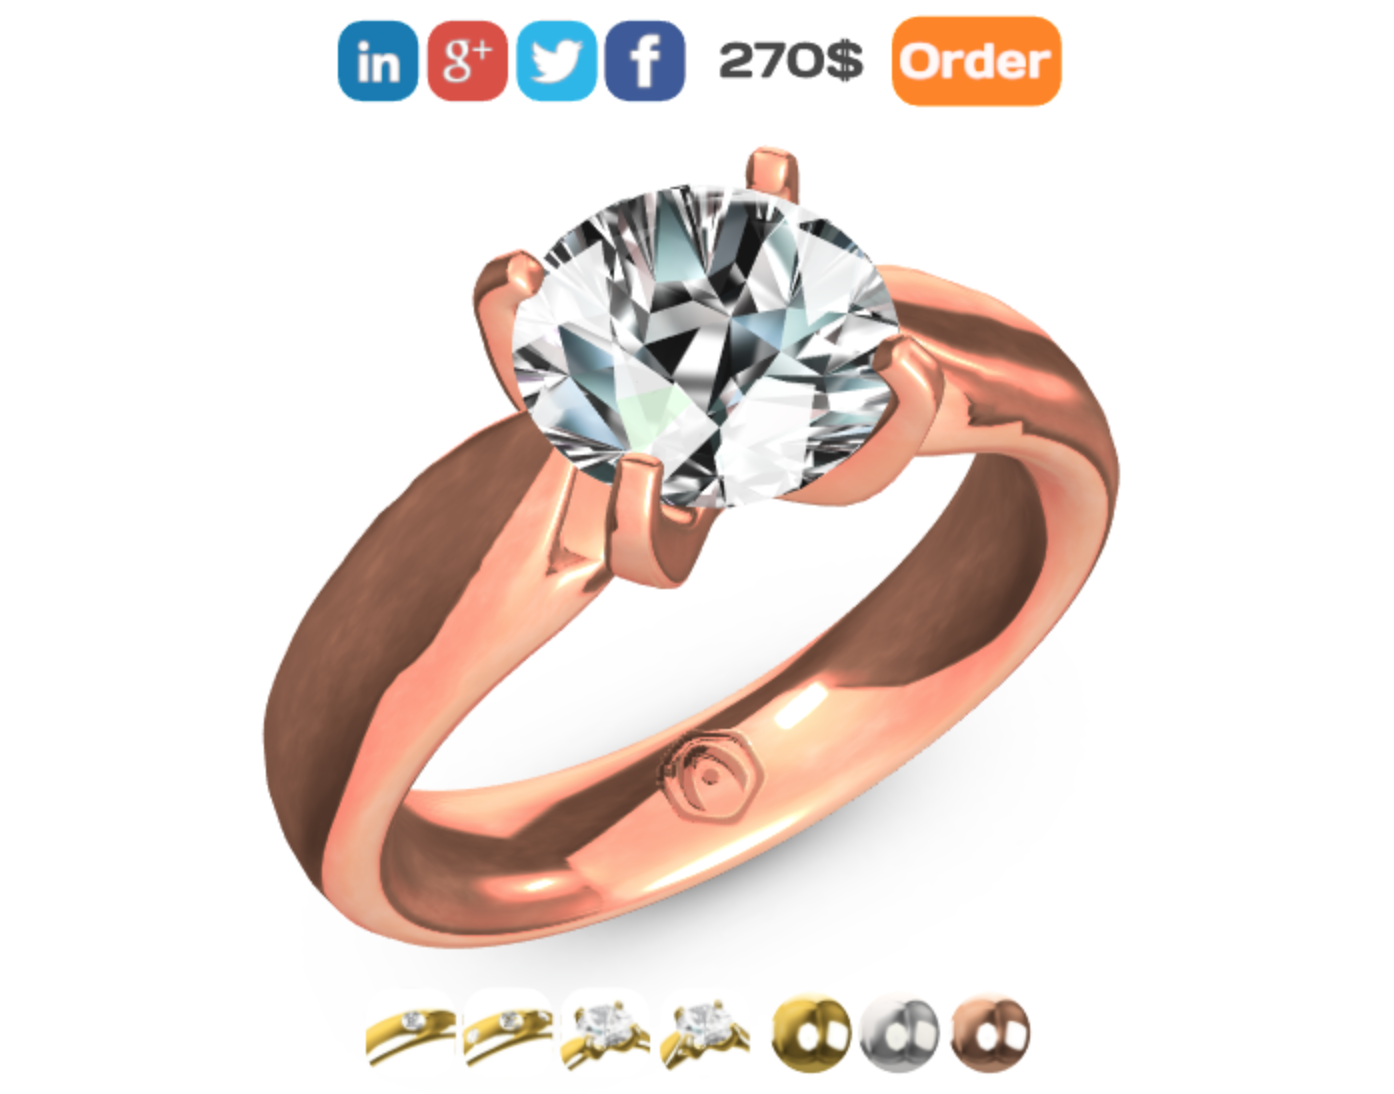
As usual, you can find the source files (Blender, 3ds Max, Maya, and Puzzles) of this configurator, as well as the WordPress plugin itself, in the latest Verge3D distribution.
The plan
So we’re going to produce an e-market which will have a 3D configurator and coupled with server-side processing. This task is not so complicated as it seems, especially if we have a good plan:
- First, we need to set up a server for your e-commerce app.
- Then we create Puzzles logic to calculate and display the total price as well as logic for sending orders.
- Finally, we add LinkedIn, X, and Facebook sharing options to your app.
Let’s review this production process step-by-step.
Setting up the server
In this tutorial, we assume that you have the WordPress content management system installed on your server. Since version 2.7, Verge3D comes with a plug-in for WordPress making 3D content easily accessible to more than 60+ million websites around the globe. This plug-in offers a nice feature which will be very handy in our project — a simple e-commerce system for processing customer orders which in turn can be submitted using the “place order” puzzle (we’re going to discuss this puzzle a bit later).
If you don’t have a server or you don’t know what WordPress is don’t panic! Simply Google “WordPress hosting” and order a ready-to-use installation of this system for several bucks per month. To start working with it you don’t have to be a programmer or an experienced web designer at all!
Let’s continue with our server installation. First, install and activate the Verge3D plugin via the “Plugins” menu in WordPress admin interface. You can find this plug-in in the official WordPress.org repository.
To handle orders sent by Verge3D applications, add an order form to some of your WordPress page/post using the following shortcode:
[ verge3d_order ]
This shortcode will create a nice form which should look something like this (actually it may look different depending on your WordPress theme):
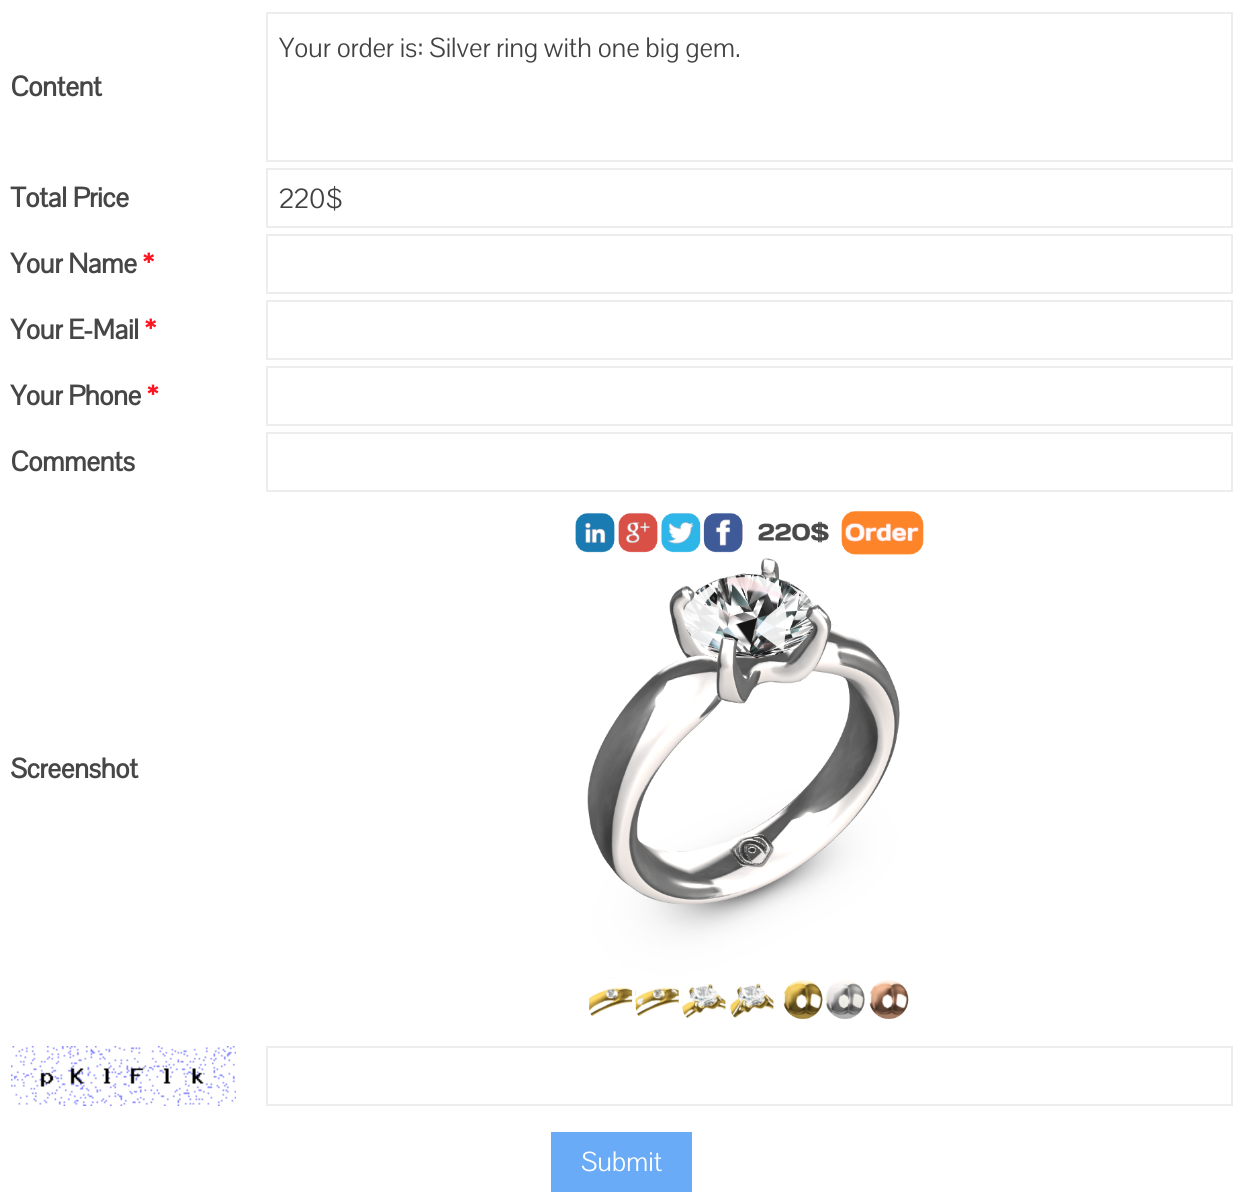
All orders sent through this order form will be accessible through the “E-Commerce” menu in your WordPress admin interface:
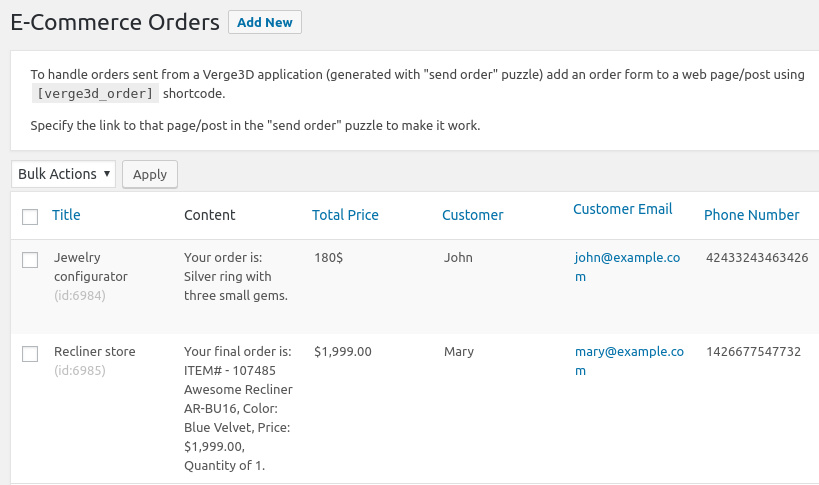
The orders in this list are created automatically upon receiving requests from your configurator app. You can use this screen for reviewing and managing customer orders. For example, when John orders a silver ring with three small gems for $180 you can call him or send an email to confirm his order and find out any additional information, such as a delivery address or payment method.
That’s all that you need to do with the server! Now it’s time to turn back to our configurator and make it work with WordPress.
Linking configurator with the order form
This part is really simple. Just use the stock “place order” puzzle to send an order. Fill-up the “sent to” URL with the link to the order form. Also, specify title, content and total price of your order. Here is what we’ve got:
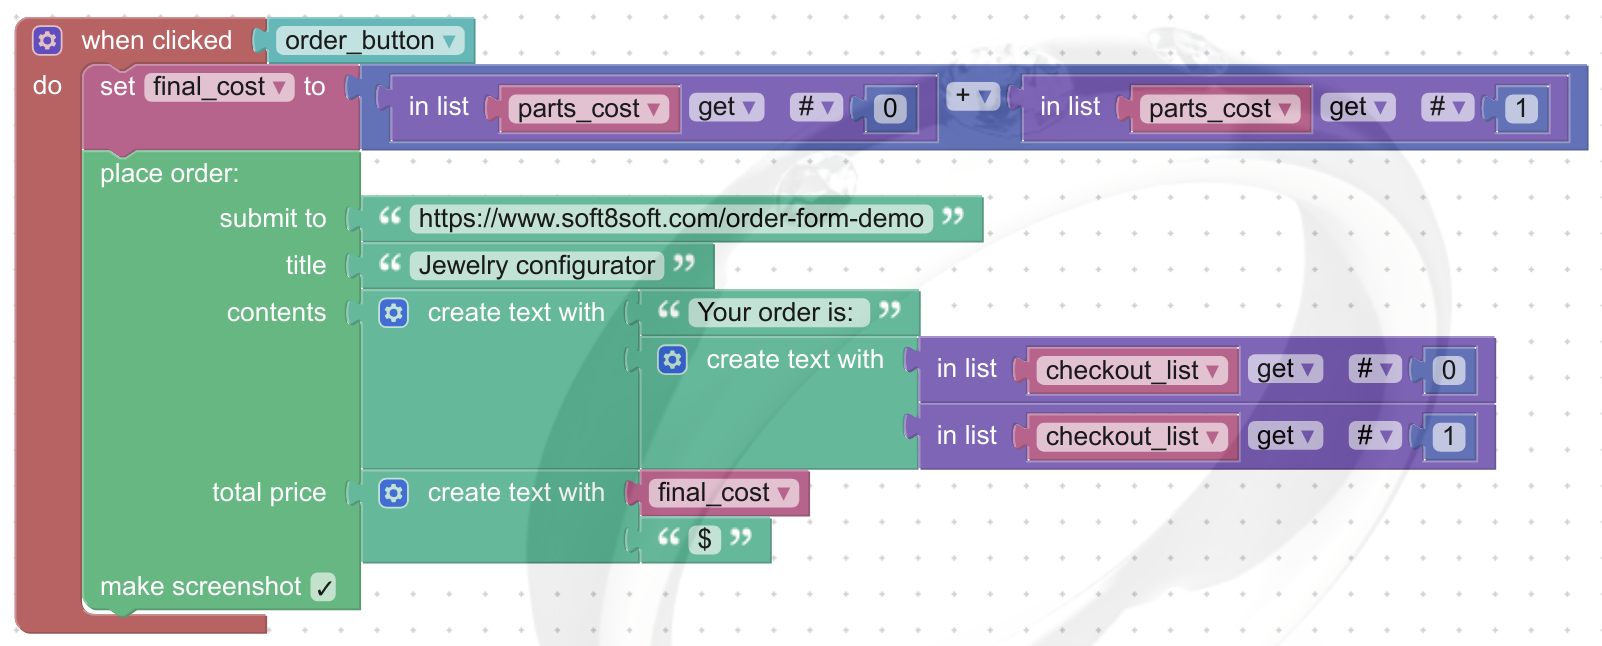
The logic is uncomplicated at all: when the user clicks on the order button we calculate the price of the ring based on the selected metal and gems. Then we use the “place order” puzzle to sent the actual order to the server.
Making your app social-aware
Have you ever seen a store without social buttons? No? Then let’s fix this with the following puzzles:

Pretty easy, right? When the user clicks on the social button we just open a new browser tab with the information we want to share: title and description.
In closing
The techniques described in this article can be used not only for product configurators but for other e-commerce applications as well. For example, you can use it to create a 3D models store or some interactive presentation of your skills if you’re a studio or freelancer. Basically, it will be useful for every application where you need to “order” something.
In regards to social media, the possible applications are basically unlimited. Use your imagination to assign social sharing capabilities to any 3D objects, not just buttons.
Thanks for reading this, feel free to share your thoughts below in the comments!
Update 2026-03-24
Updated text and images to reflect recent developments.

hi Alexander Kovelenov ,great tutorial
but i am 3D artist ,we dont have any web design experience,so i want google web designer tutorial ,like this product configurator .
Hi,
thank you for your reply! Verge3D is fully compatible with Google Web Designer and we have plans to create a tutorial on how to use this tool to create 3D configurators. Stay tuned!