- This topic has 7 replies, 3 voices, and was last updated 2 years ago by
joeb.
-
AuthorPosts
-
2024-05-05 at 4:51 pm #72630
joeb
ParticipantI have created in Blender a 3d image with 45 buttons with textures. I export it to WordPress using the verge3d plugin and everything works perfect. I can use a attribute and click on a variation image and verge3d updates my image.
Now I have added a second attribute that is a png file and is transparent. I can click on my 2nd attribute image and verge 3d updates the image but it will not show the underlying image. It only shows the png file plus I can’t ever get back to the first attribute or image unless I reload the page. In Puzzels I am using 2 – assign material plugins that work.Would I use something else with this to make it work or a different puzzel?
And why do I have to re-load the page to get to see my first attribute work again?Picture a t-shirt in the first attribute yellow and the second attribute is an image on the front that is transparent so you can see the yellow color. Then change to blue or whatever and the second image is still there on top.
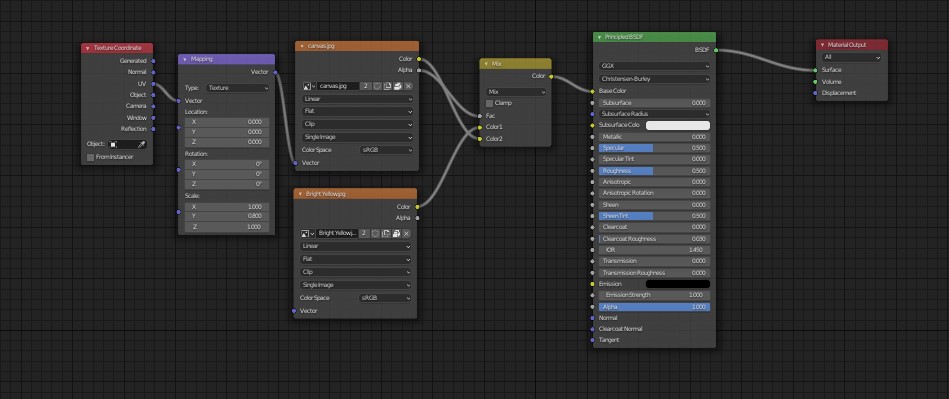
In Blender I can see this work with this shader setup
Attachments:
2024-05-07 at 11:58 am #72929 Yuri KovelenovStaff2024-05-07 at 6:25 pm #73058Participant
Yes it is the material texture that is changing. If I did it with images on the descriptive side I would need way to many photos so that would not work. I saw a plugin from Cyberfox that will do almost the same thing. It looks like there plugin will upload an image from the users PC. That will work but I need it to be able to use my online attributes which are the back material and front in the transparent if possible. If I could see there puzzles maybe I could use one of theres to make it work. But they are not very helpful.
2024-05-08 at 7:02 am #73257Yuri KovelenovStaffIsn’t it something similar to what the Custom Image demo does?
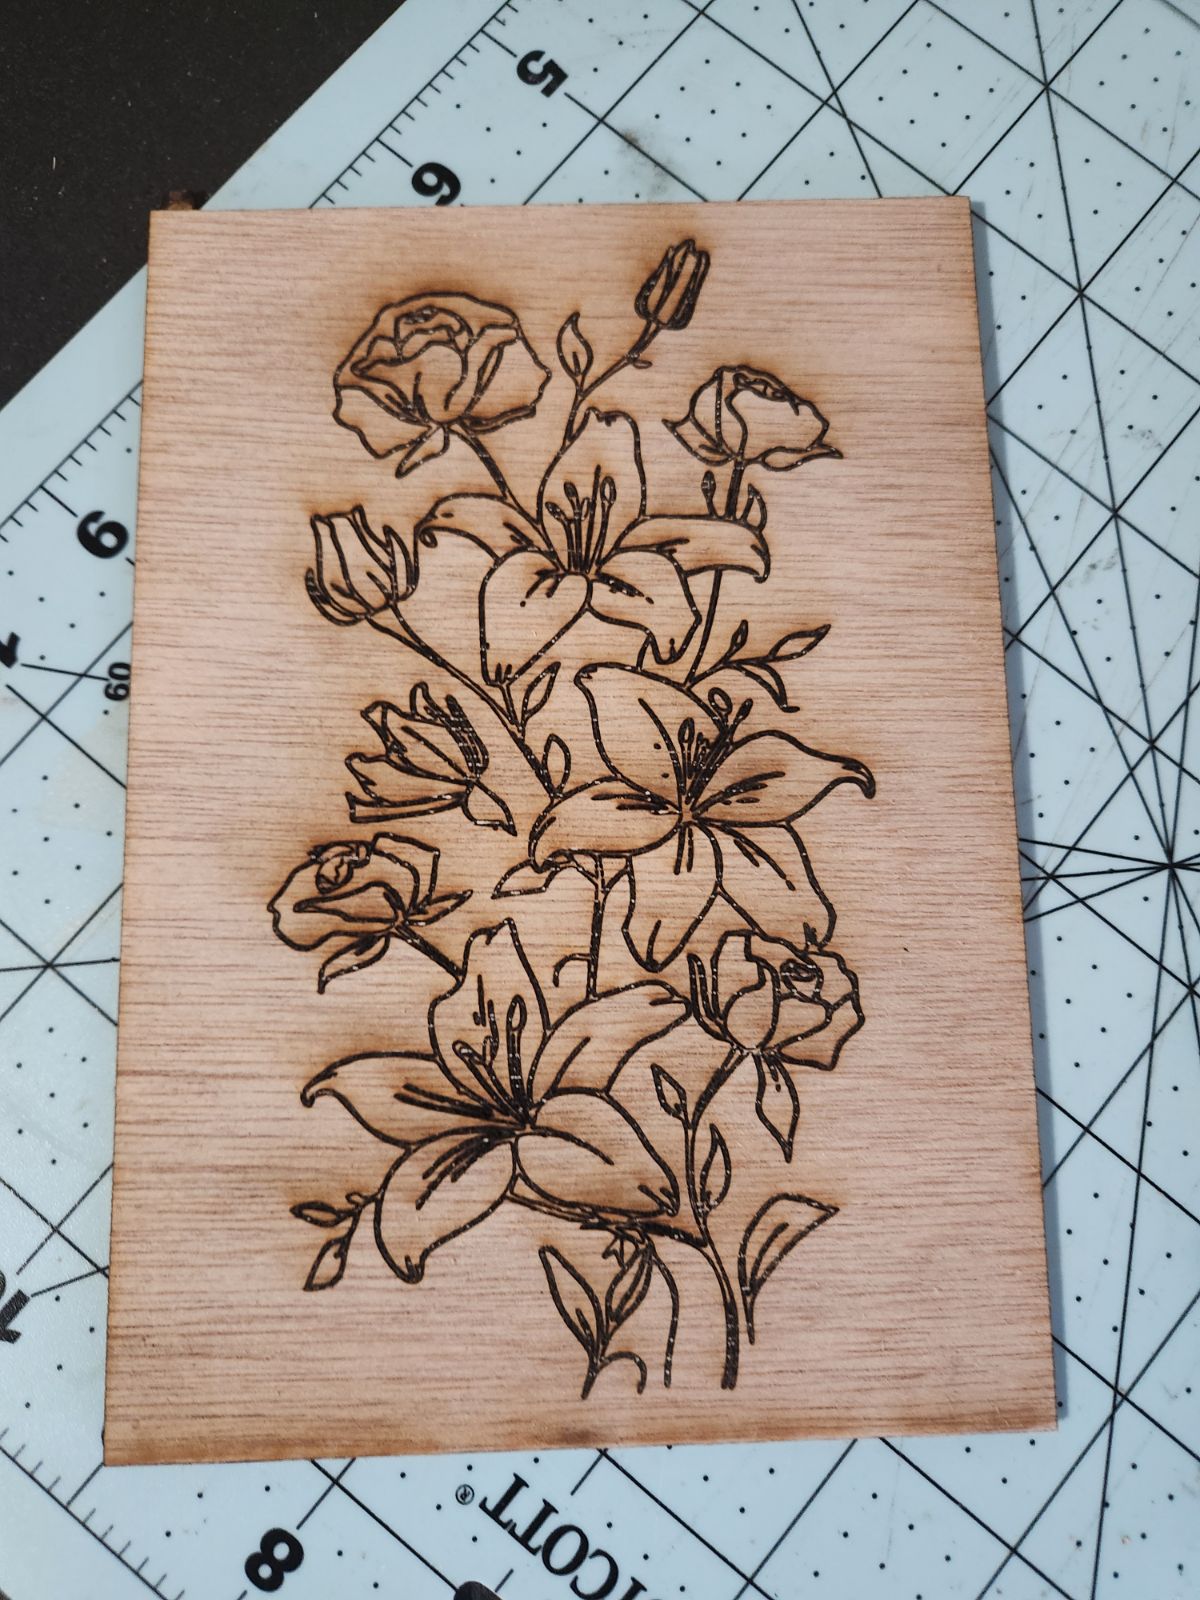
2024-05-09 at 2:38 pm #73883ParticipantYes, similar take your frame that’s made out of wood and use that same material for the white foam board that photo gets uploaded behind or to. Now the uploaded image needs to be transparent, so I can see the wood coming through the transparency of the image. This image is used for engraving, so I need to see the background of the first image or that wood frame. I’m able to change that wood frame material . Is this possible?
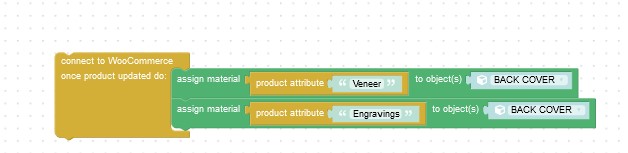
2024-05-09 at 4:51 pm #73913ParticipantHere is an example of what I need. The wood can change now with what I am doing but the engraving will be a transparent image on top of the wood material. Hopefully this makes more sense.
Attachments:
2024-05-09 at 11:32 pm #73976 xeonCustomer
This sounds like you are trying to create a situation where you can change out the wood type and leave and or change the engraving art so a person can select their design and their wood type indepently. Is this correct?
If so, a simple approach would be to have two objects in your blend file. For simplicity lets say two planes. The lower plane will be called wood and the upper plane will be called engraving.
The wood object would have a material called wood with an image texture. Nothing special.
The engraving object would have an image texture that has an alpha channel. An image texture node would be setup with color-space set to none and its output plugged into the alpha channel of a BSDF shader. You can use the base color to make the engraving any color or use another image texture node with the color-space set to RGB to drive the color input of the BSDF.To change the color of the wood. You will have a 3D or HTM L button…and use the when clicked puzzle or the on event of click typically. Inside either you are going to use the Assign Material puzzle if the material exists in your scene, either as a button or hidden from camera view. Alternatively you can use the Replace Texture puzzle if you need to download this image from a website.
Xeon
Route 66 Digital
Interactive Solutions - https://www.r66d.com
Tutorials - https://www.xeons3dlab.com2024-05-18 at 1:25 pm #74269ParticipantEverything worked like you thought with the two planes I’ve been able to do all of this with ping files. Thanks so much for your help.
-
AuthorPosts
- You must be logged in to reply to this topic.